In this blog post, I will teach you how to put your Laravel app / site onto Heroku (using the browser interface) for free. Since Hosting on Heroku is free, this is ideal for hosting any of your projects in your portfolio. Let's get started.
Sign in to Heroku
First, sign up or sign in to Heroku. In the Heroku Dashboard, you will see a button "New". Click on this button and then "create new app".
Give your app a name. Whatever name you choose will become part of the URL of the app. So if you name the app: my-clone-project, then the URL will become my-clone-project.herokuapp.com.
Also, choose whichever region you want.
How to deploy Laravel app to Heroku
In this tutorial, I will show you how to do it directly through the browser (instead of through the CLI).
Before we start, make sure you have the project in a Github repo.
Procfile
-
In the root directory of your project, create a file called
Procfile. In this file paste this inweb: vendor/bin/heroku-php-apache2 public/. This is a configuration file for Heroku. -
Now commit this change and push it to your Github repo. Quick example:
git add .,git commit -m "add procfile",git push origin master.
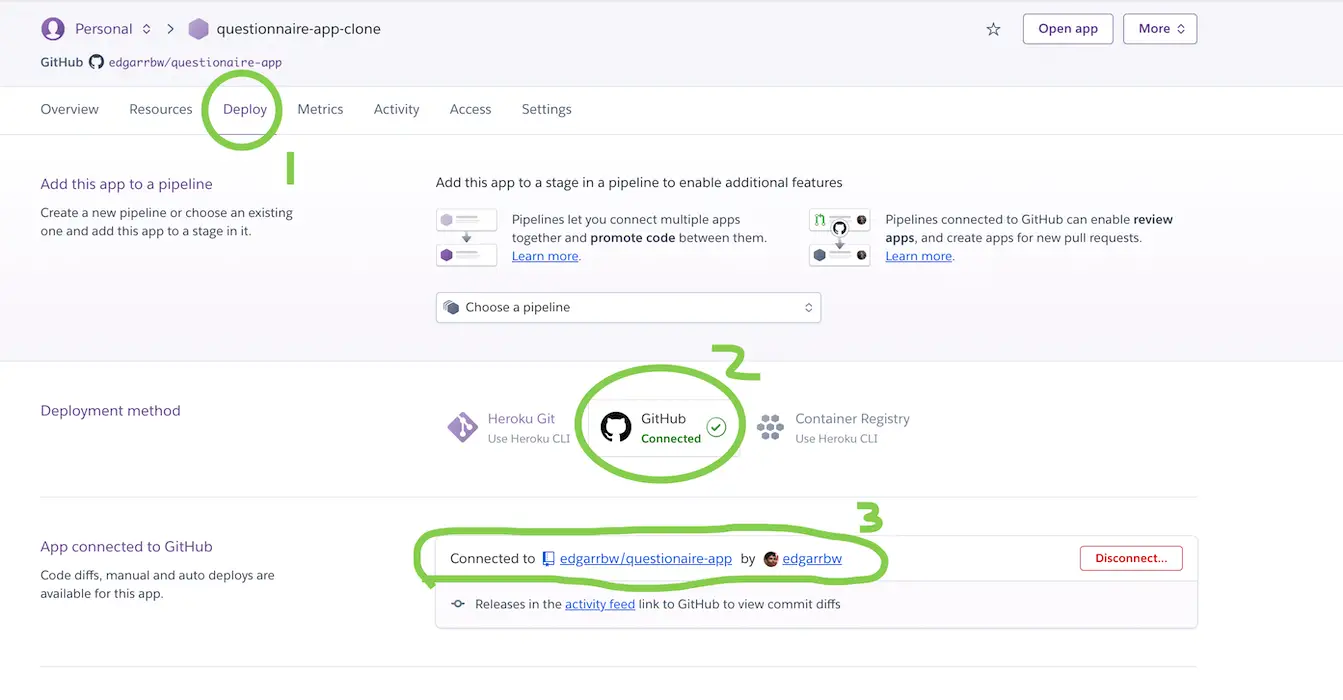
Github integration
-
Now that you have the procfile, you need to click on the
deploytab in the Heroku dashboard. Where it saysDeployment method, choose github. -
Sign in and then search for the repo of the project. Then connect to it.
-
Scroll down to the
Automatic deployssection andEnable automatic deploys. This makes it so that "Every push to master will deploy a new version of this app. Deploys happen automatically". -
Scroll to
Manual Deployanddeploy branch. It's not really going to work yet since we haven't set up the environment variables or the database. This is just to make sure everything builds and installs correctly.
Database addon
- Click on the Resouces tab. In the
add-onssection, search forJawsDB MySQLand choose the free plan. This is the free database I will be using. Click it, and it should open a new tab with a jawsdb dashboard. Keep this tab open.
Setting up env variables
- Click on the Settings tab. Then click on
reveal config variables.
App env
-
Now you will put the environment variables. Open your
.envfile in your project to see which ones you need. Take a look at my pic and replace my specific values with yours.Replace the
APP_KEYwith your own from your.envfile. Make theAPP_NAMEto what you want your app name to be. TheAPP_URLwill be what you named your app followed by .herokuapp.com. For example, mine ishttps://questionnaire-app-clone.herokuapp.com/.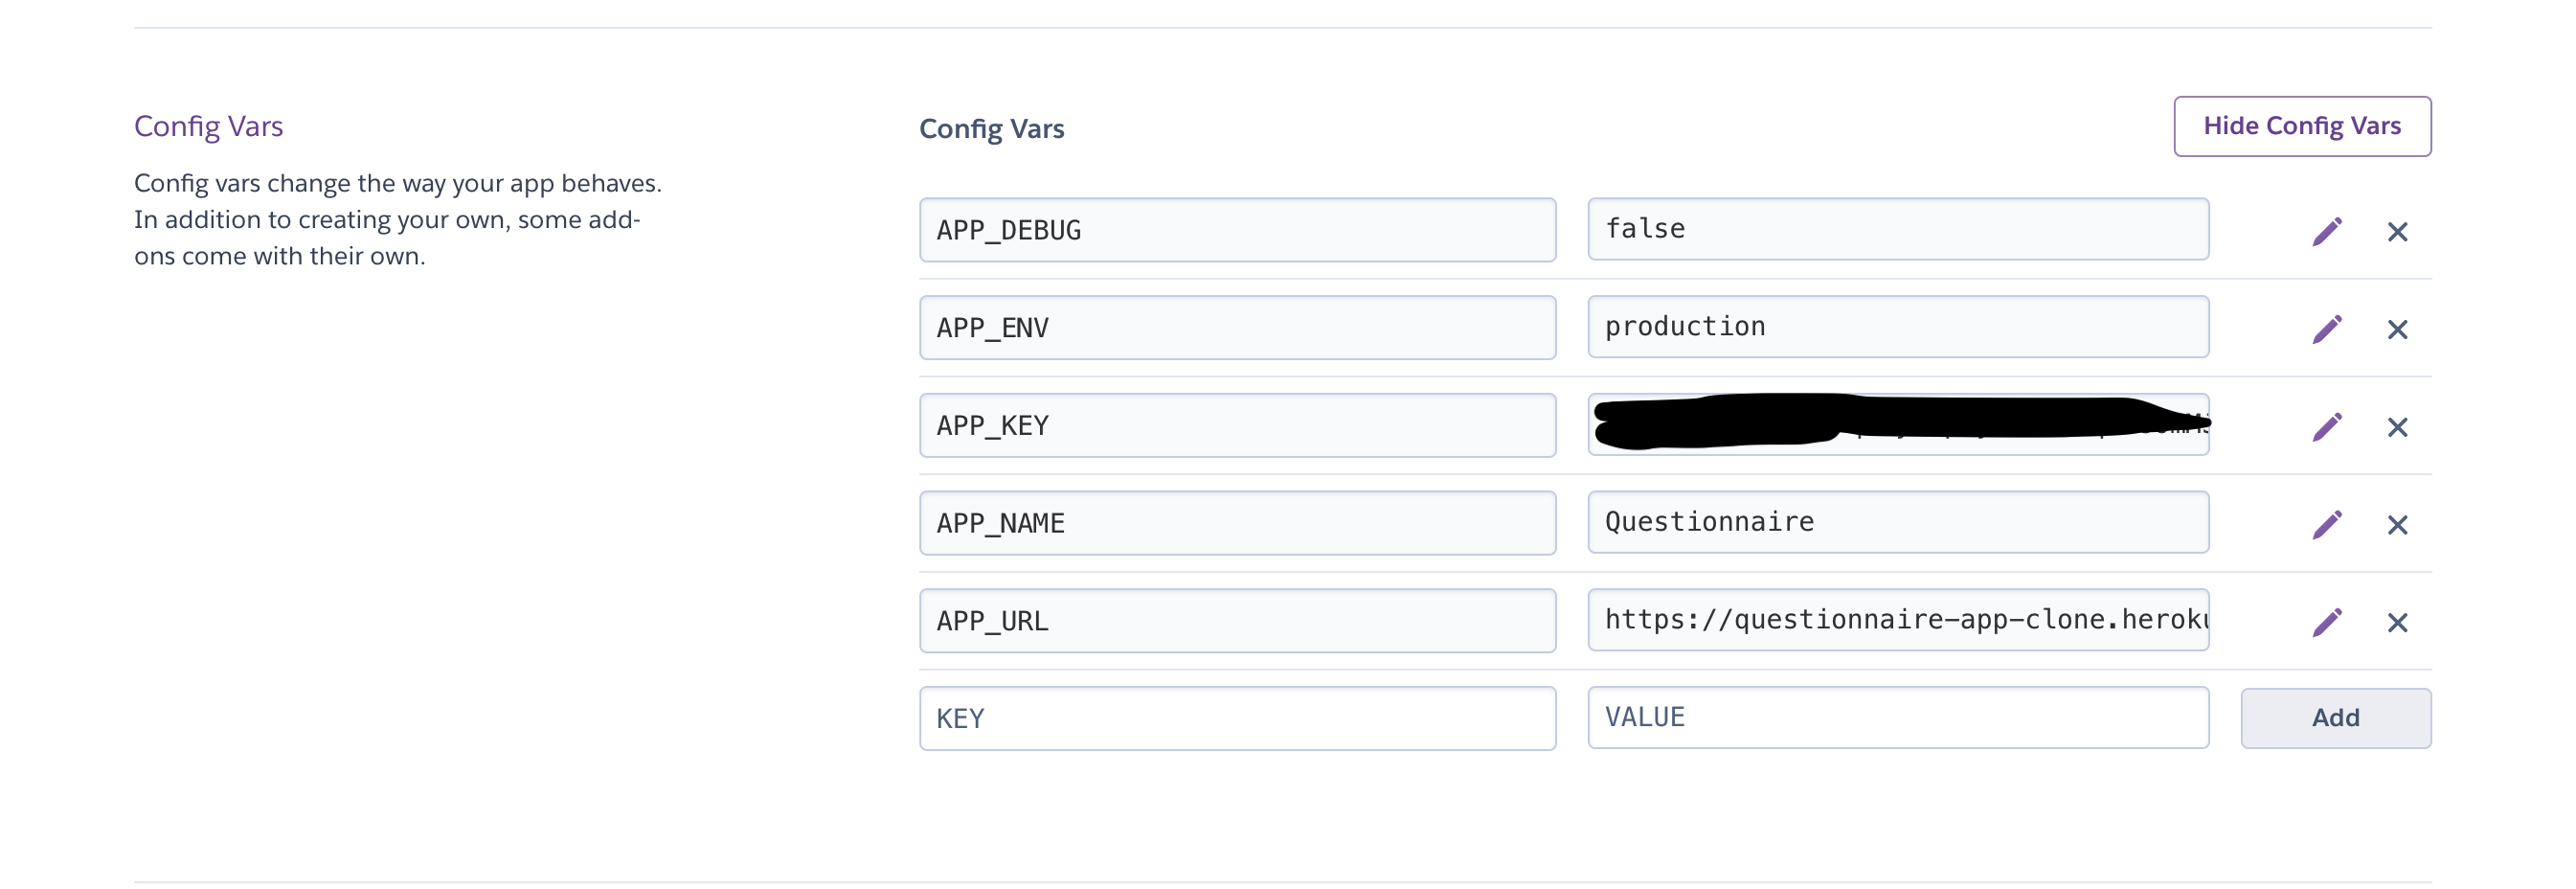
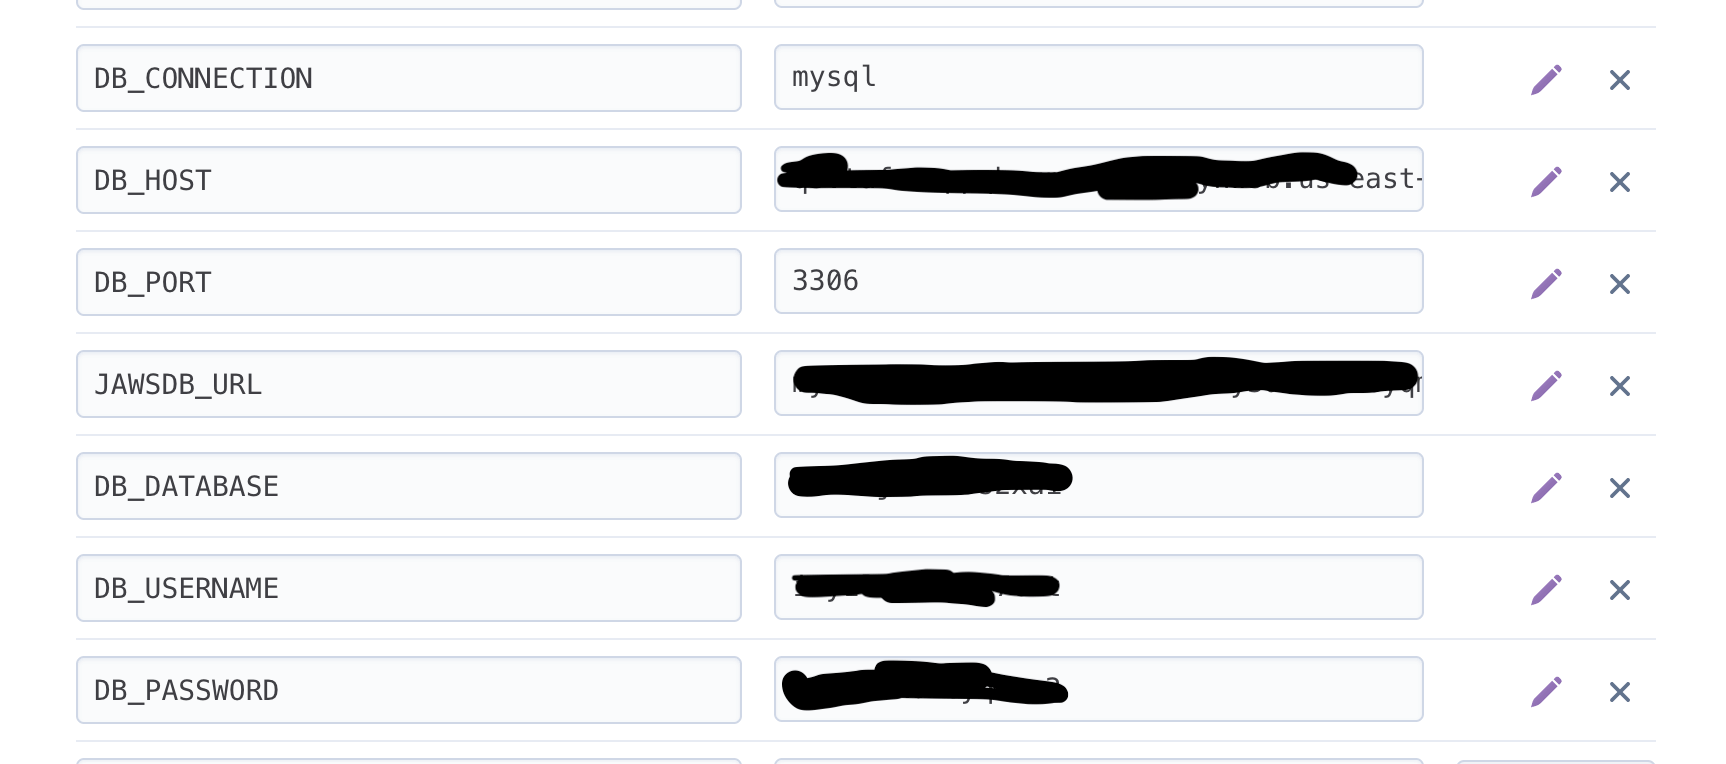
DB env
-
Now we will be adding the database env variables. Please see the pic and replace the values accordingly. All the correct values you will be getting from the jawsdb dashboard. If you closed the tab, open it again in the Resources tab and clicking the jawsdb add on or go to the jawsdb dashboard.
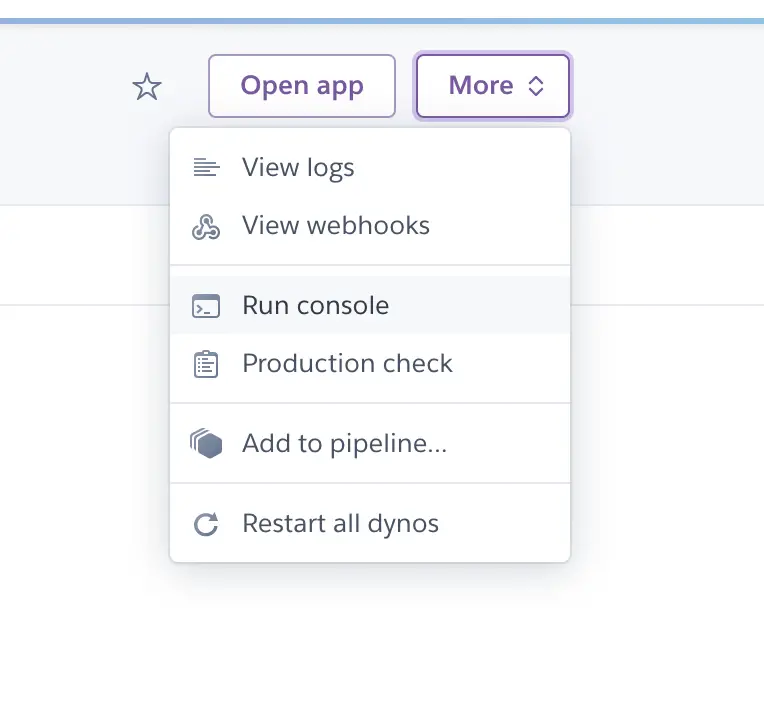
Checking if it all works
-
Click on More (near the top) and then Run Console.
-
Type in
php artisan migrate(if you need to do any seeding, do it here too). If it's a success, it should look like my screenshot.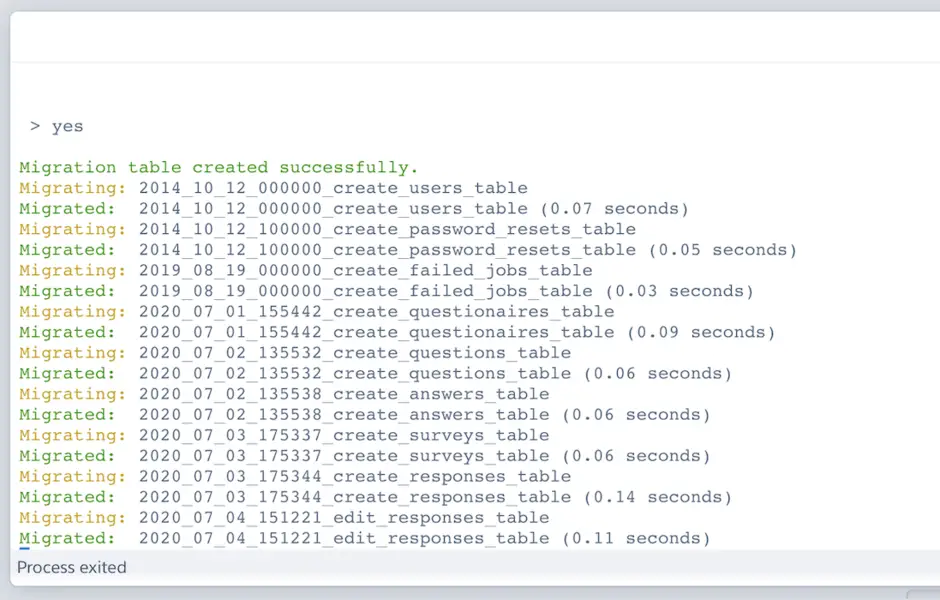
That's it!
Your application should now be working. Click on Open App in your heroku dashboard to see it in action. Play around and create users, etc, to make sure it all works.
To administer the database, I recommend something like tableplus or mysql workbench.
Keep in mind that, with this free database, we can’t name our database. So if any of your SQL queries in the app contain the database name, you will need to switch it.
In case you want to see the app I deployed, it's here questionnaire app.