One thing I noticed that many beginners do incorrectly is upload images to their site without optimizing them. They don't resize the images or compress them. They simply upload the image as is to their sites.
After reading this article, you should know what to do to properly resize and compress your images before uploading them to your site.
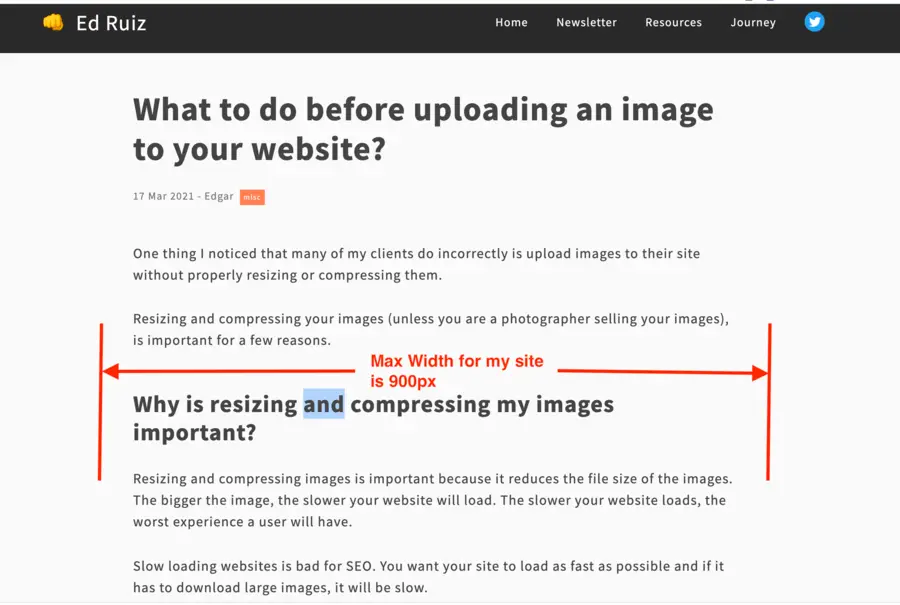
Why is resizing and compressing my images important?
Resizing and compressing your images is essential to have a fast-loading website. A fast loading site is good for SEO and provides a better user experience.
Resizing and compressing images reduces the file size of the images. The bigger the image, the slower your website will load. The slower your website loads, the worse experience a user will have.
You'd be surprised how much an image can reduce in size after compression. More than 75% in size reduction many cases. And you won't even notice the difference in quality.
What size/dimensions should the images be?
The size/dimension an image should be depends on where the image will be shown and the container it is in. What do I mean by container? For example, the blog post you are reading now, the maximum size an image can be in width is 900px.
Your container might not have a limit.
Therefore, as a rule of thumb, I recommend a maximum width of around 2000px. So that if the image has to stretch, it doesn't become distorted. Don't worry about the height.
What file Size should the images be?
As a rule of thumb, I recommend images be no bigger than 450KB. If it's less, it's better. Keep in mind, the more images you have, it adds up, so if you have multiple images with large file sizes, it can cause your page to be slow.
How to compress images?
To compress the images, there are a variety of tools you can use. My recommendation is to use tinypng.com. You just drag and drop the images and let it work its magic.
If you are using WordPress, you can find many plugins that accomplish this task. One I have used in the past is Smush smushit. The good thing about this is that you configure the settings to do the compression for you. However, for some reason, I prefer to compress the images myself with tinypng and then upload the compressed version to WordPress.
How to resize images?
The way I resize images is with resizeimage.net. Upload the image, and choose the width. Then click resize and download the resized version.
Steps to follow
The following is what I recommend you follow to resize and compress your images:
- First, resize the images using resizeimage.net
- Compress the image using tinypng.com
- Upload the resized and compressed image to your site.
Example of an image being reduced
Let me show you an example so you understand why it's good to resize and compress your images.
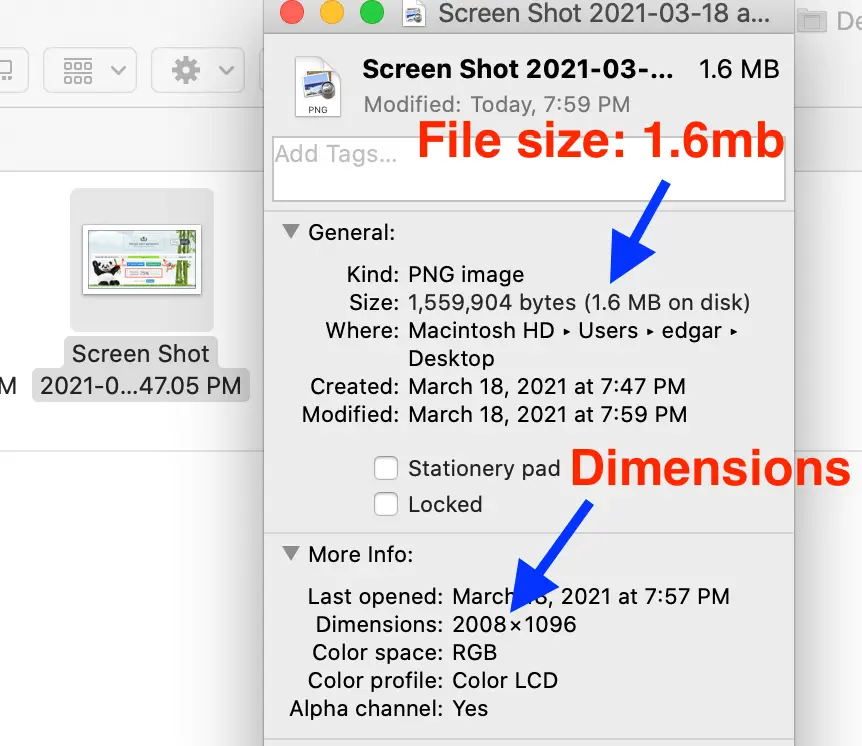
I took a screenshot that was 2008x1096px and 1.5MB size.
For this example, since I mentioned my max container is 900px, I resized the image to a width of 1000px.
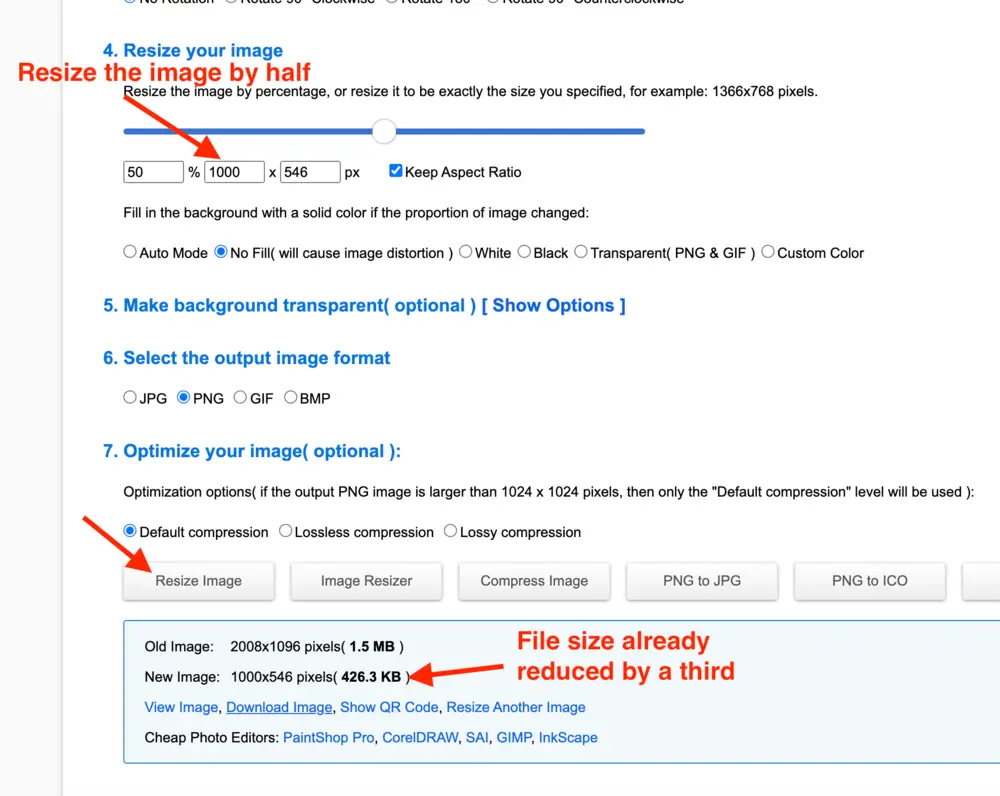
As you can see, the image file size has already been reduced by more than 1MB.
Finally, I compress the image:
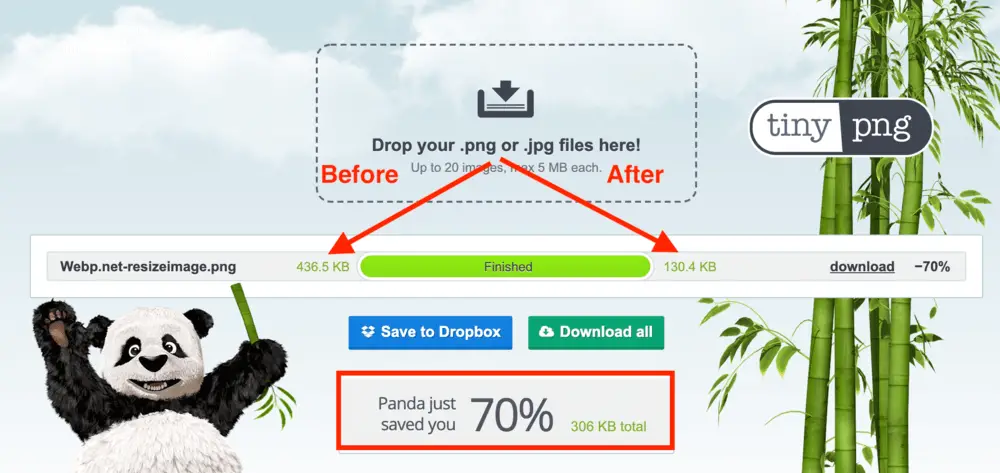
The final file size is 130.4kb. The image file size was reduced by around 1.4MB. A considerable reduction that will speed up your site.
I hope you now understand how to properly optimize your images before uploading them to your site.