If you use SiteGround for hosting and need to create an FTP account, this article will show you how. Also, you will learn how to connect to an FTP account using FileZilla.
How to create an FTP Account in Siteground
-
Log into your SiteGround account.
-
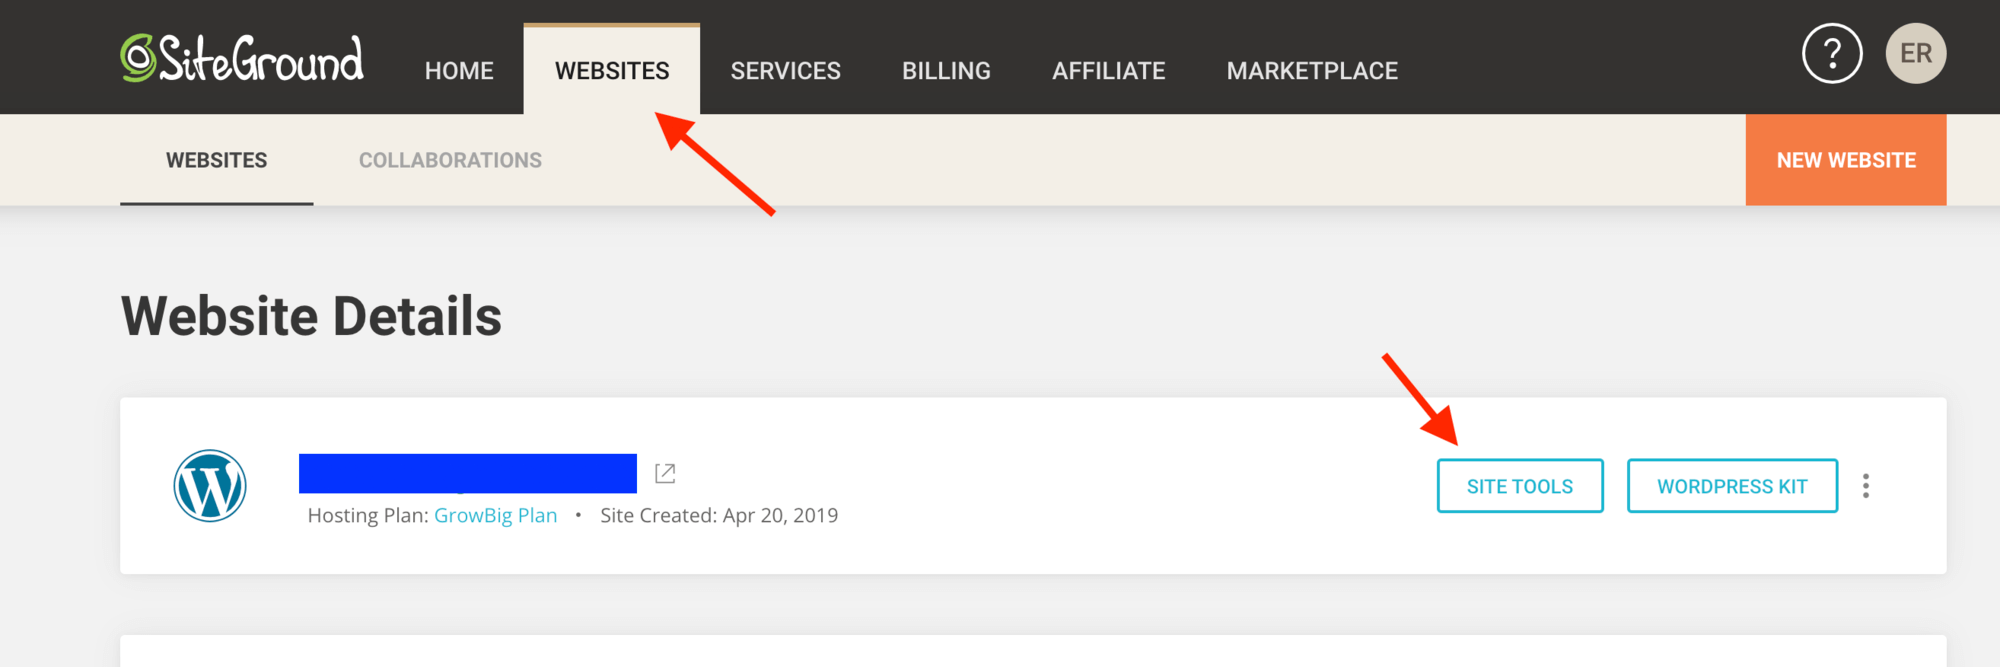
Click on the WEBSITES tab and then on SITE TOOLS.
-
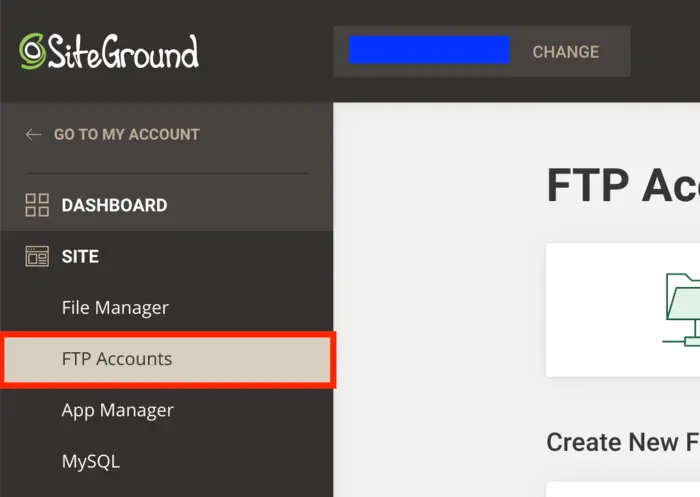
On the sidebar, click on SITE > FTP Accounts.
-
From here, you'll be able to create an FTP Account. Choose an Account name and a password.
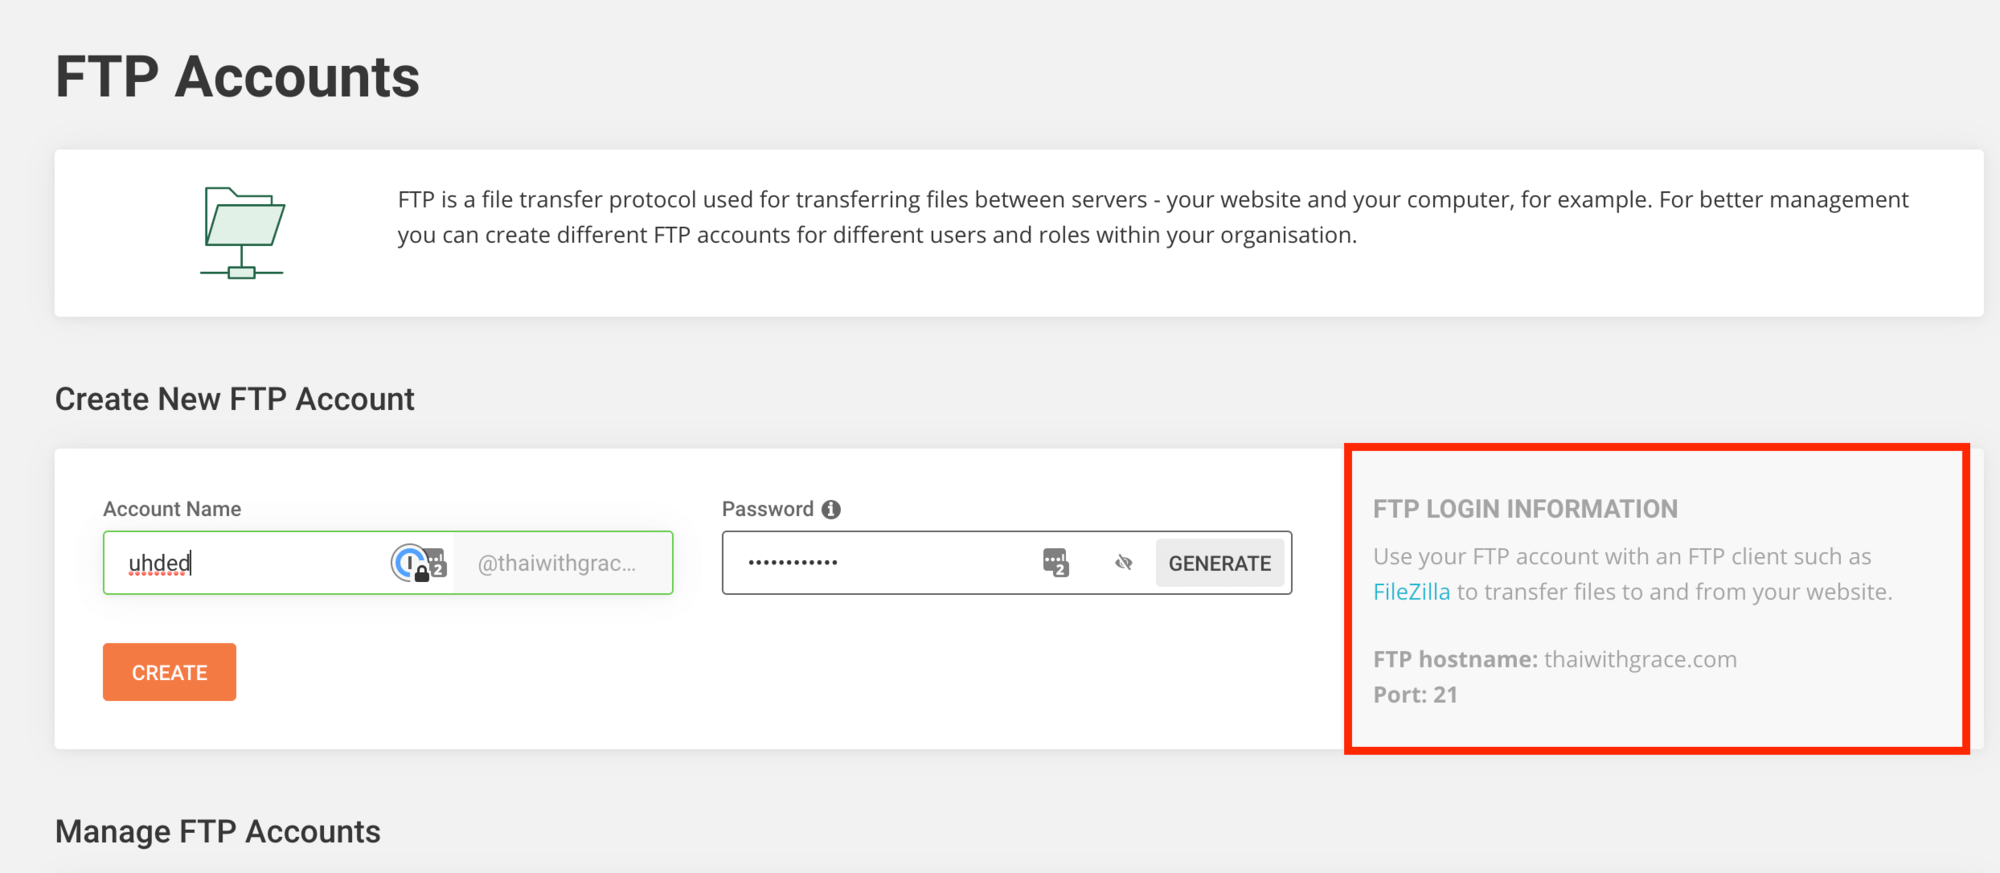
In this example, I created an account name of [email protected]. As you can see in the screenshot, the FTP Hostname is thaiwithgrace.com, and the port is 21.
How to login into your FTP Account using FileZilla?
Now that you have your SiteGround FTP Account, you will want to login. Whether it's for deleting plugins from your WordPress site, or to transfer images to your site, etc, this guide will show you how to log into your FTP Account.
This guide will show you how to do it using FileZilla. FileZilla is probably the most popular free FTP client. It's free, and you can download it here: https://filezilla-project.org/.
Once you downloaded FileZilla:
-
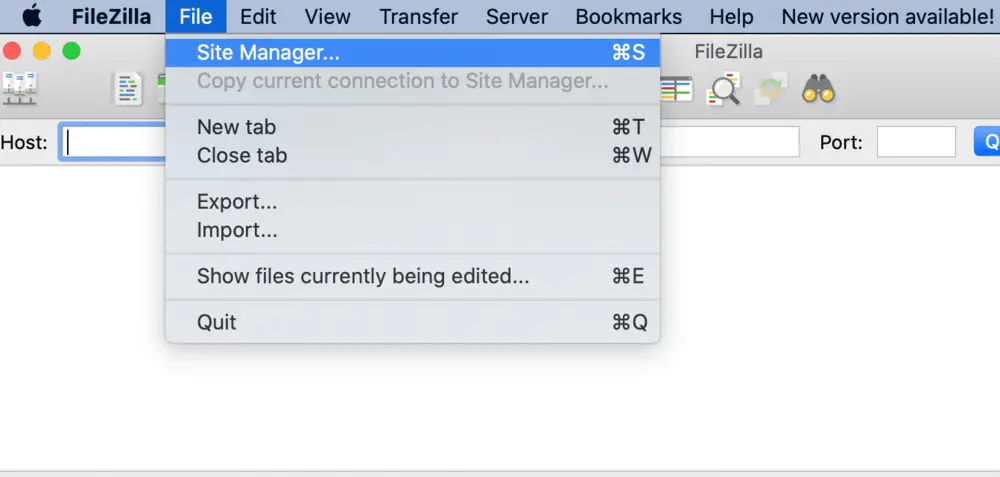
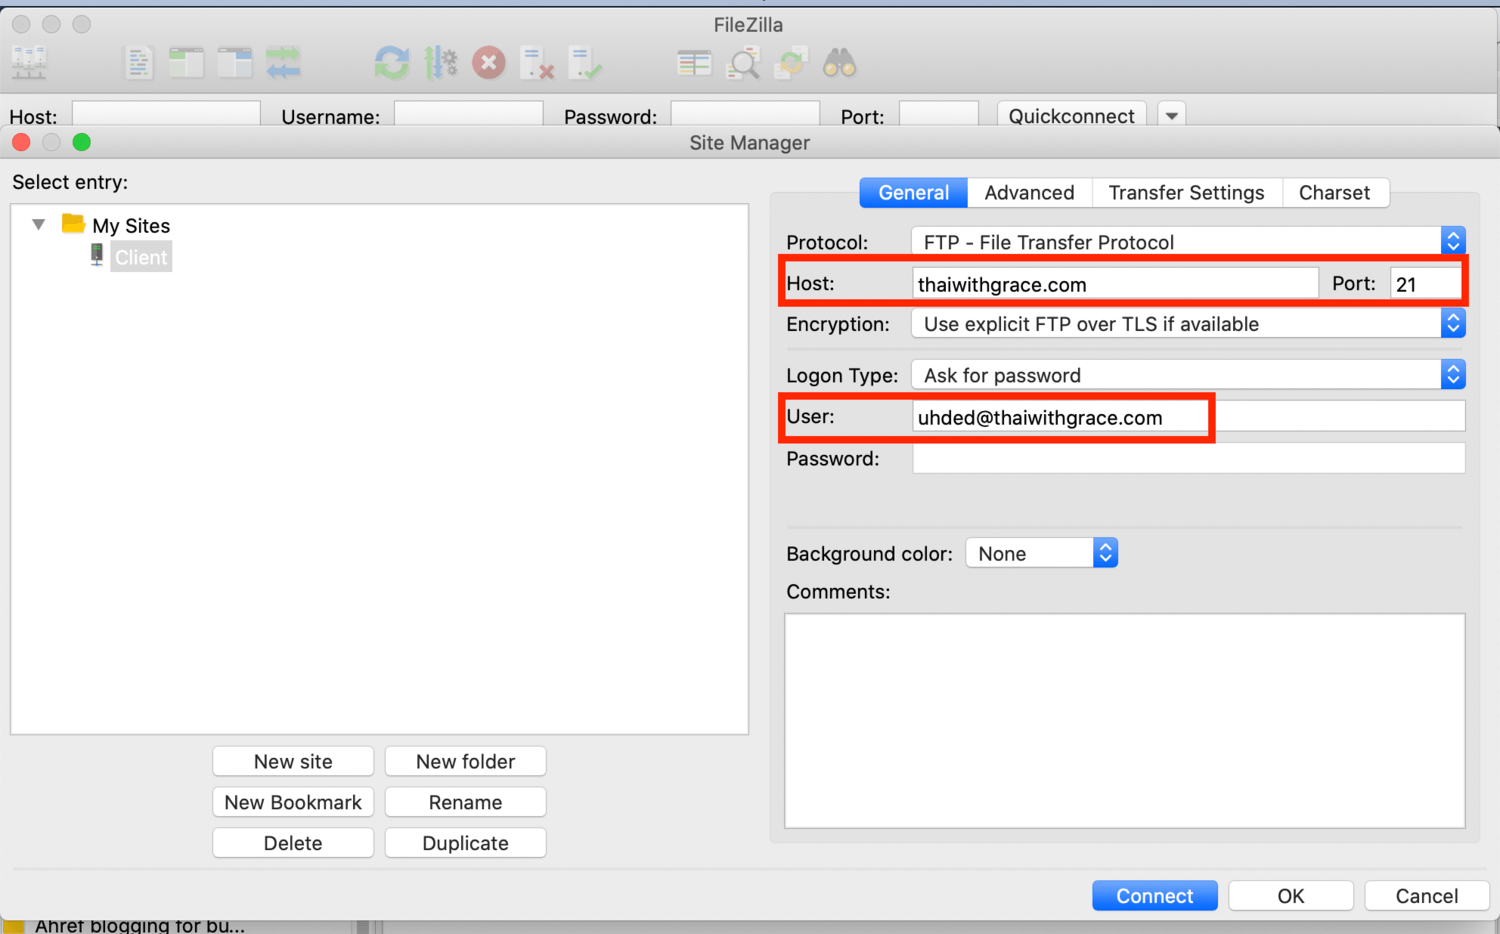
Click on File -> Site Manager
-
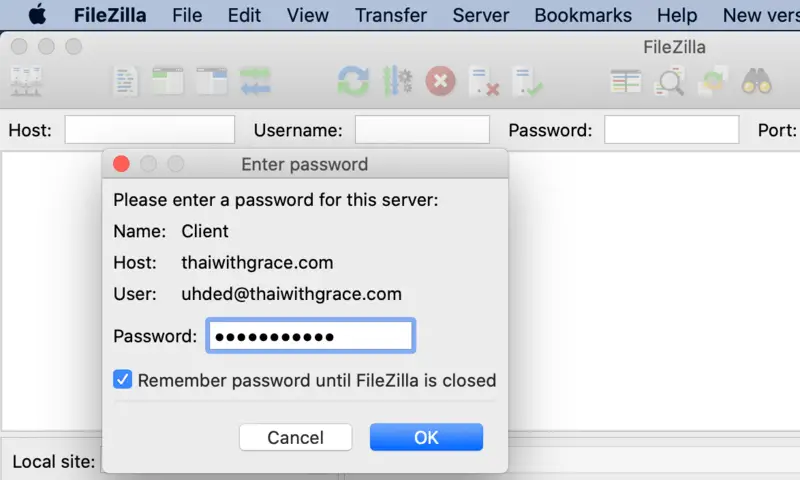
Fill in the Host, Port, and User from the FTP Account you created. In this example, I am using the account I created earlier. Leave the rest of the options as shown in the screenshot. After clicking "Connect", FileZilla will ask you for the password.
-
Enter your password
-
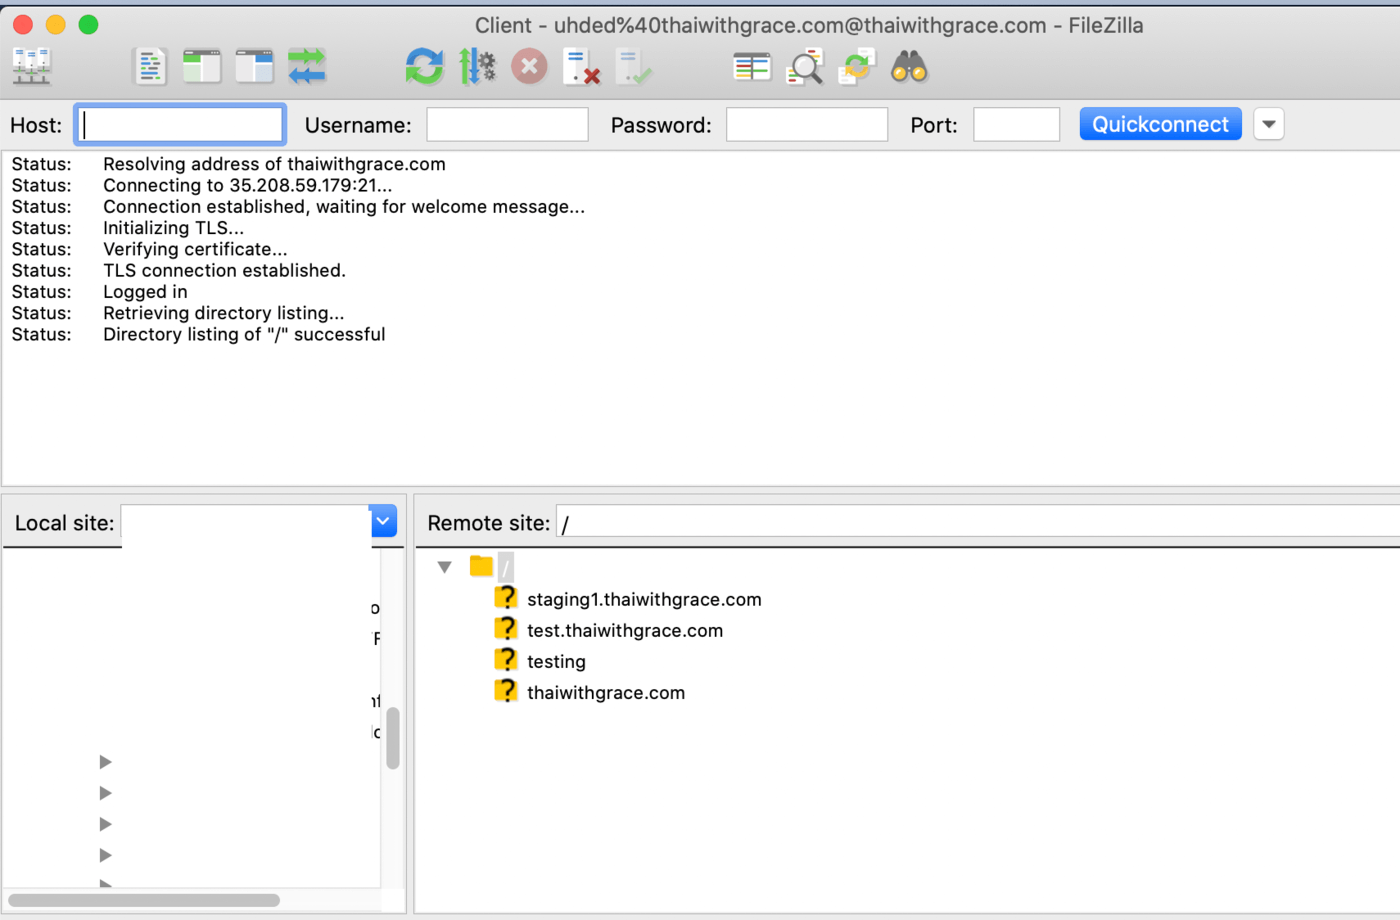
You should be connected now. If something failed, it should give you some sort of error message regarding what the issue was. If it was successful, you should see something like the following:
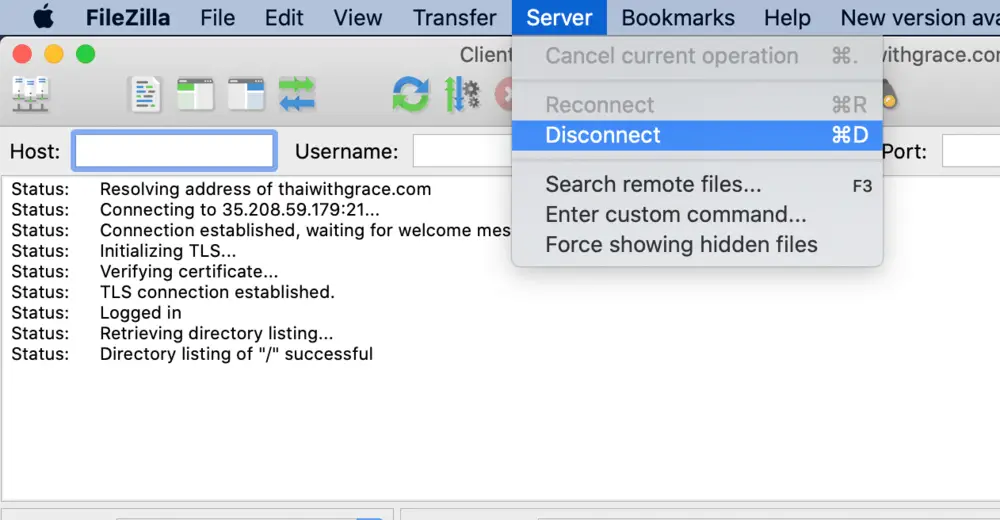
That's it. If you want to disconnect, click on Server > Disconnect.
You should now know how to create an FTP account on SiteGround and how to connect to your FTP account using FileZilla.