You might need to add an ID to a header in WordPress for many reasons, whether you want to make your own table of contents or link to that heading within the same or another article. After reading, you will know how to add the ID to the heading.
Adding ID to the header using Classic editor
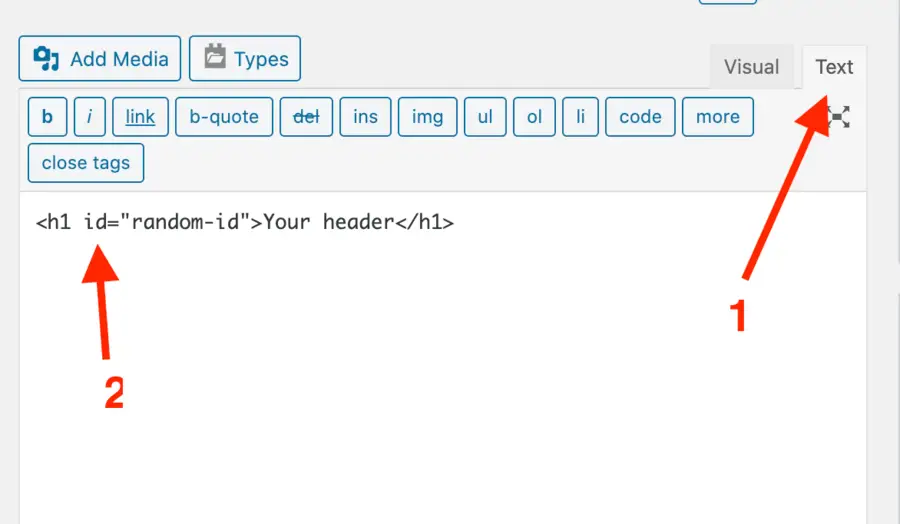
To add the ID to the header using the classic editor:
-
Click on the Text tab (see screenshot). You should see your header there, something like
<h1>Your header</h1>(you might see h2, h3, h4, etc, it's the same process). -
Add
id="write-an-id-here"in between the first h1 and >, like so<h1 id="random-id">Your Header</h1>.Write any "id" you want.

Adding ID to the header using Block editor (Gutenberg)
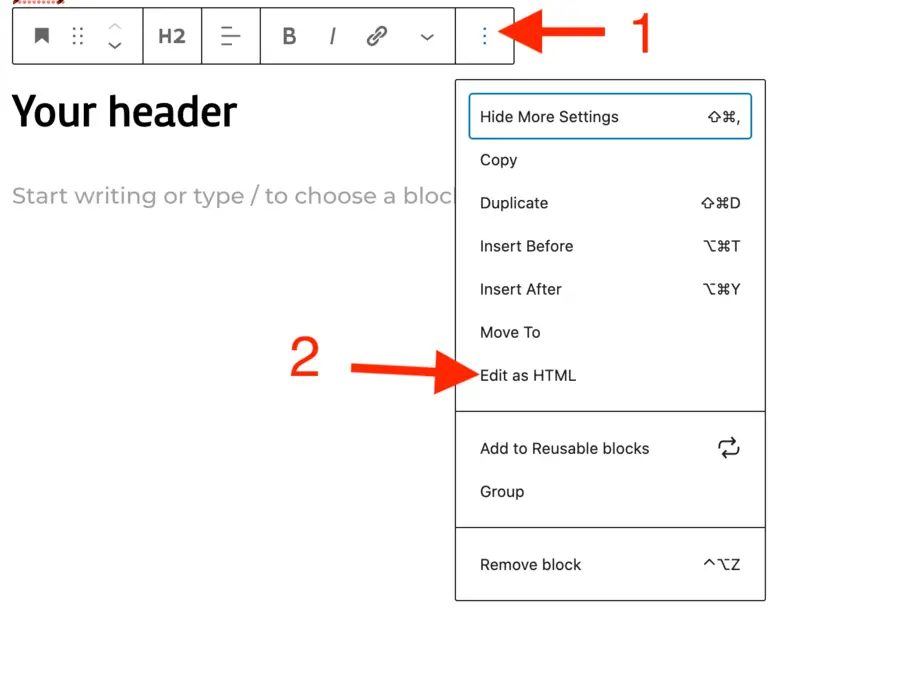
To add the ID to the header using the block editor:
-
Click on the heading block and then on the 3 vertical dots.
-
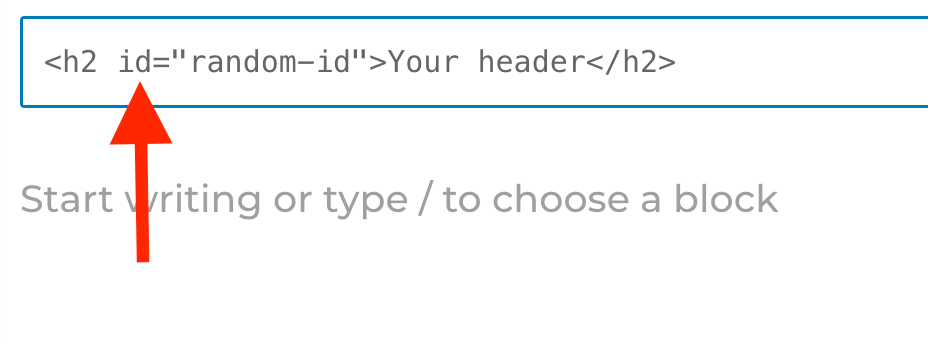
Select "Edit as HTML". You should see your header as HTML code, something like
<h1>Your header</h1>.
-
Add
id="write-an-id-here"in between the h1 and >, like so<h1 id="random-id">Your Header</h1>.Write any "id" you want.

How to link to the section
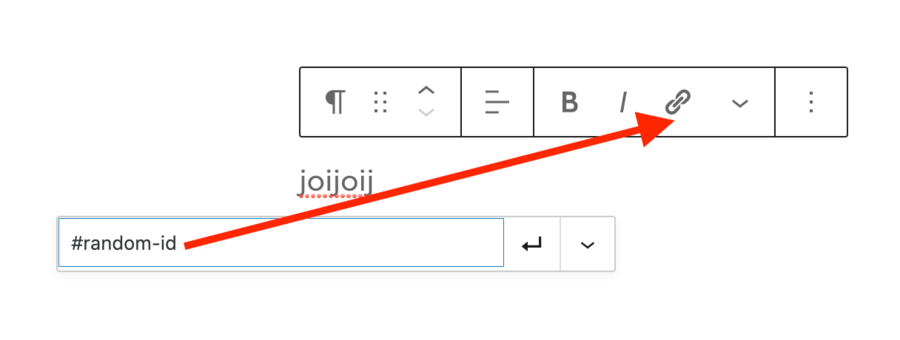
Now that you have your ID, let's say you named the ID random-id. We can link to it in the same page like so <a href="#random-id">Random Id</a>. You can do this via the HTML code or by creating a link like you normally do in WordPress (see screenshot). Thanks to adding the ID, we can reference it with the hashtag symbol.

As an example, I added the ID random-id to my header, so this link (using #random-id) will take me there.
If you want to link to it from another page, add #random-id to the end of the URL. Example: https://uhded.com/add-id-header-wordpress#random-id. So this link (using the entire URL) will also take me there.